
How to Install Pendant Lights: A Step-by-Step Guide & Key Considerations
From current home decor trends, it’s clear that attention to detail is paramount. To elevate the beauty of ceilings, beyond designing dropped ceilings, many are adding ambient light strips around them. Pendant lights are a popular choice for adding style and function to our homes. But what should you pay attention to when installing them? Let’s dive into the installation process and crucial safety tips.
Part 1: How to Install a Pendant Light?
- Gather Materials: Before starting, ensure you have all necessary tools and materials: wooden battens (if needed), mounting plates, hardware components (screws, hooks, anchors), screwdriver, drill, hammer, wire strippers, measuring tape, ladder, and the pendant light kit itself. Accurately measure the light’s dimensions and mark its precise installation location on the ceiling.
- Drill Pilot Holes: Connect your drill and carefully drill pilot holes into the ceiling material (e.g., drywall/plasterboard or concrete) at the marked points. If mounting to a false ceiling (like gypsum board), ensure you locate the supporting framework or use appropriate hollow-wall anchors. Insert wall plugs or anchors if required for your ceiling type. Fill any unintended gaps around the holes with spackle, joint compound, or cement paste, and allow it to dry completely before proceeding.
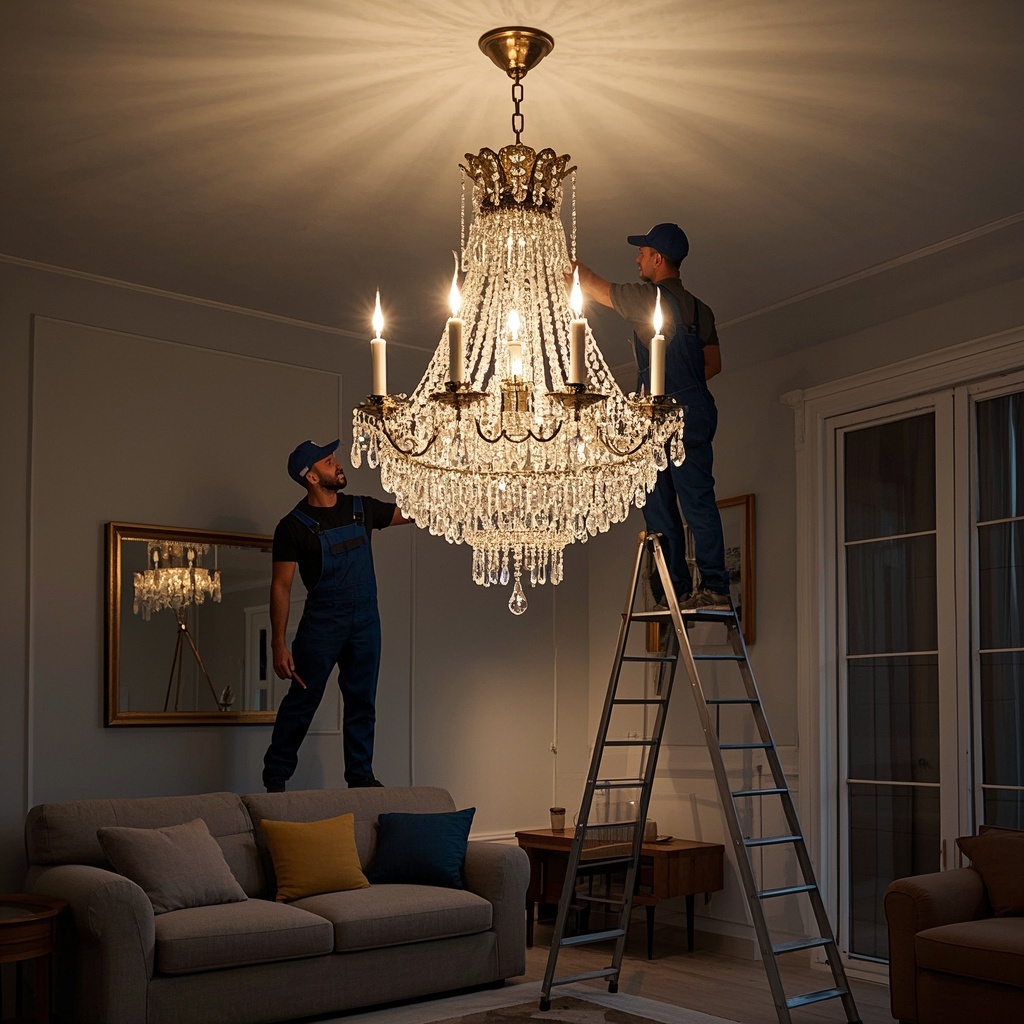
- Secure the Mounting Bracket: This is critical! Firmly attach the light fixture’s mounting bracket or crossbar to the ceiling using suitable screws into the anchors, joists, or framework. Ensure it is absolutely level and can fully support the weight of the light fixture. An insecure bracket compromises safety and the light’s longevity.
- Connect the Wiring: Carefully thread the fixture wires through the canopy and down rod (if present). Connect the fixture wires to the corresponding household circuit wires (typically black/red to black/red [live/hot], white to white [neutral], and green/bare copper to green/bare copper [ground]) within the ceiling junction box. Use wire nuts (connectors) and ensure all connections are tight and secure. If the light has a switch, ensure the wiring path accommodates it correctly. Crucially: Follow the manufacturer’s wiring diagram.
- Attach the Fixture & Test: Secure the fixture’s canopy to the mounting bracket using the provided screws. Assemble the remaining parts (arms, shades, bulbs) according to the manufacturer’s instructions. Install the appropriate light bulbs (ensure wattage does not exceed the fixture’s rating). Restore power at the circuit breaker and test the light using its switch. Make any final adjustments to the fixture’s position or height.
Part 2: Key Installation Considerations & Safety
- Pre-Installation Check: Before installation, inspect all parts of the pendant light for completeness, damage, or deformation.
- Structural Support: The absolute priority is ensuring the ceiling mounting point (junction box and bracket) is rated to safely support the full weight of the pendant light. Standard plastic junction boxes are often insufficient for heavier fixtures; use boxes specifically rated and secured for fixture support.
- Junction Box Requirement: Every pendant light must be installed using a proper ceiling junction box. Only one pendant light fixture should be connected to a single junction box.
- Wiring Safety: The fixture’s wiring must be in perfect condition with no exposed joints or splices within the fixture or canopy. The minimum wire cross-section used within the fixture must be not less than 0.4 mm². Connections inside the junction box must be made so that the wires cannot pull loose under the weight of the fixture, causing it to fall.
- Incandescent Bulbs (if used): Fixtures using incandescent bulbs must not be installed directly on combustible materials (like untreated wood). If the distance between the bulb and any insulating surface (e.g., socket base) is less than 5mm, insulating measures must be taken to prevent heat buildup. Never exceed the fixture’s maximum rated wattage.
- Fluorescent Bulbs (if used): For fixtures with integrated fluorescent tubes, the ballast must be connected to the live (hot) wire. The lamp holders must have safety features to prevent tubes from falling out. Ensure sufficient slack wire is left within the fixture housing for servicing.
- Large Fixtures: For oversized or linear pendant lights, ensure the fixture’s frame runs parallel to the room’s main decorative lines and sits flush against the ceiling surface.
- Lamp Holders (Sockets): In screw-type sockets (Edison base), the live (hot) wire must connect to the center contact terminal, and the neutral wire to the threaded shell terminal. The socket’s insulating material must be intact, without cracks or damage, to prevent electric shock.
- Hooks for Heavy Fixtures: If the pendant light uses a hanging hook for support, the hook’s diameter must be sufficient for the fixture’s hanging loop and must be at least 6mm in diameter.
By carefully following these steps and adhering to these critical safety considerations, you can successfully and safely install a beautiful pendant light that enhances your home’s ambiance and style. Remember, when in doubt, consult a qualified electrician.